Hey Newbie,
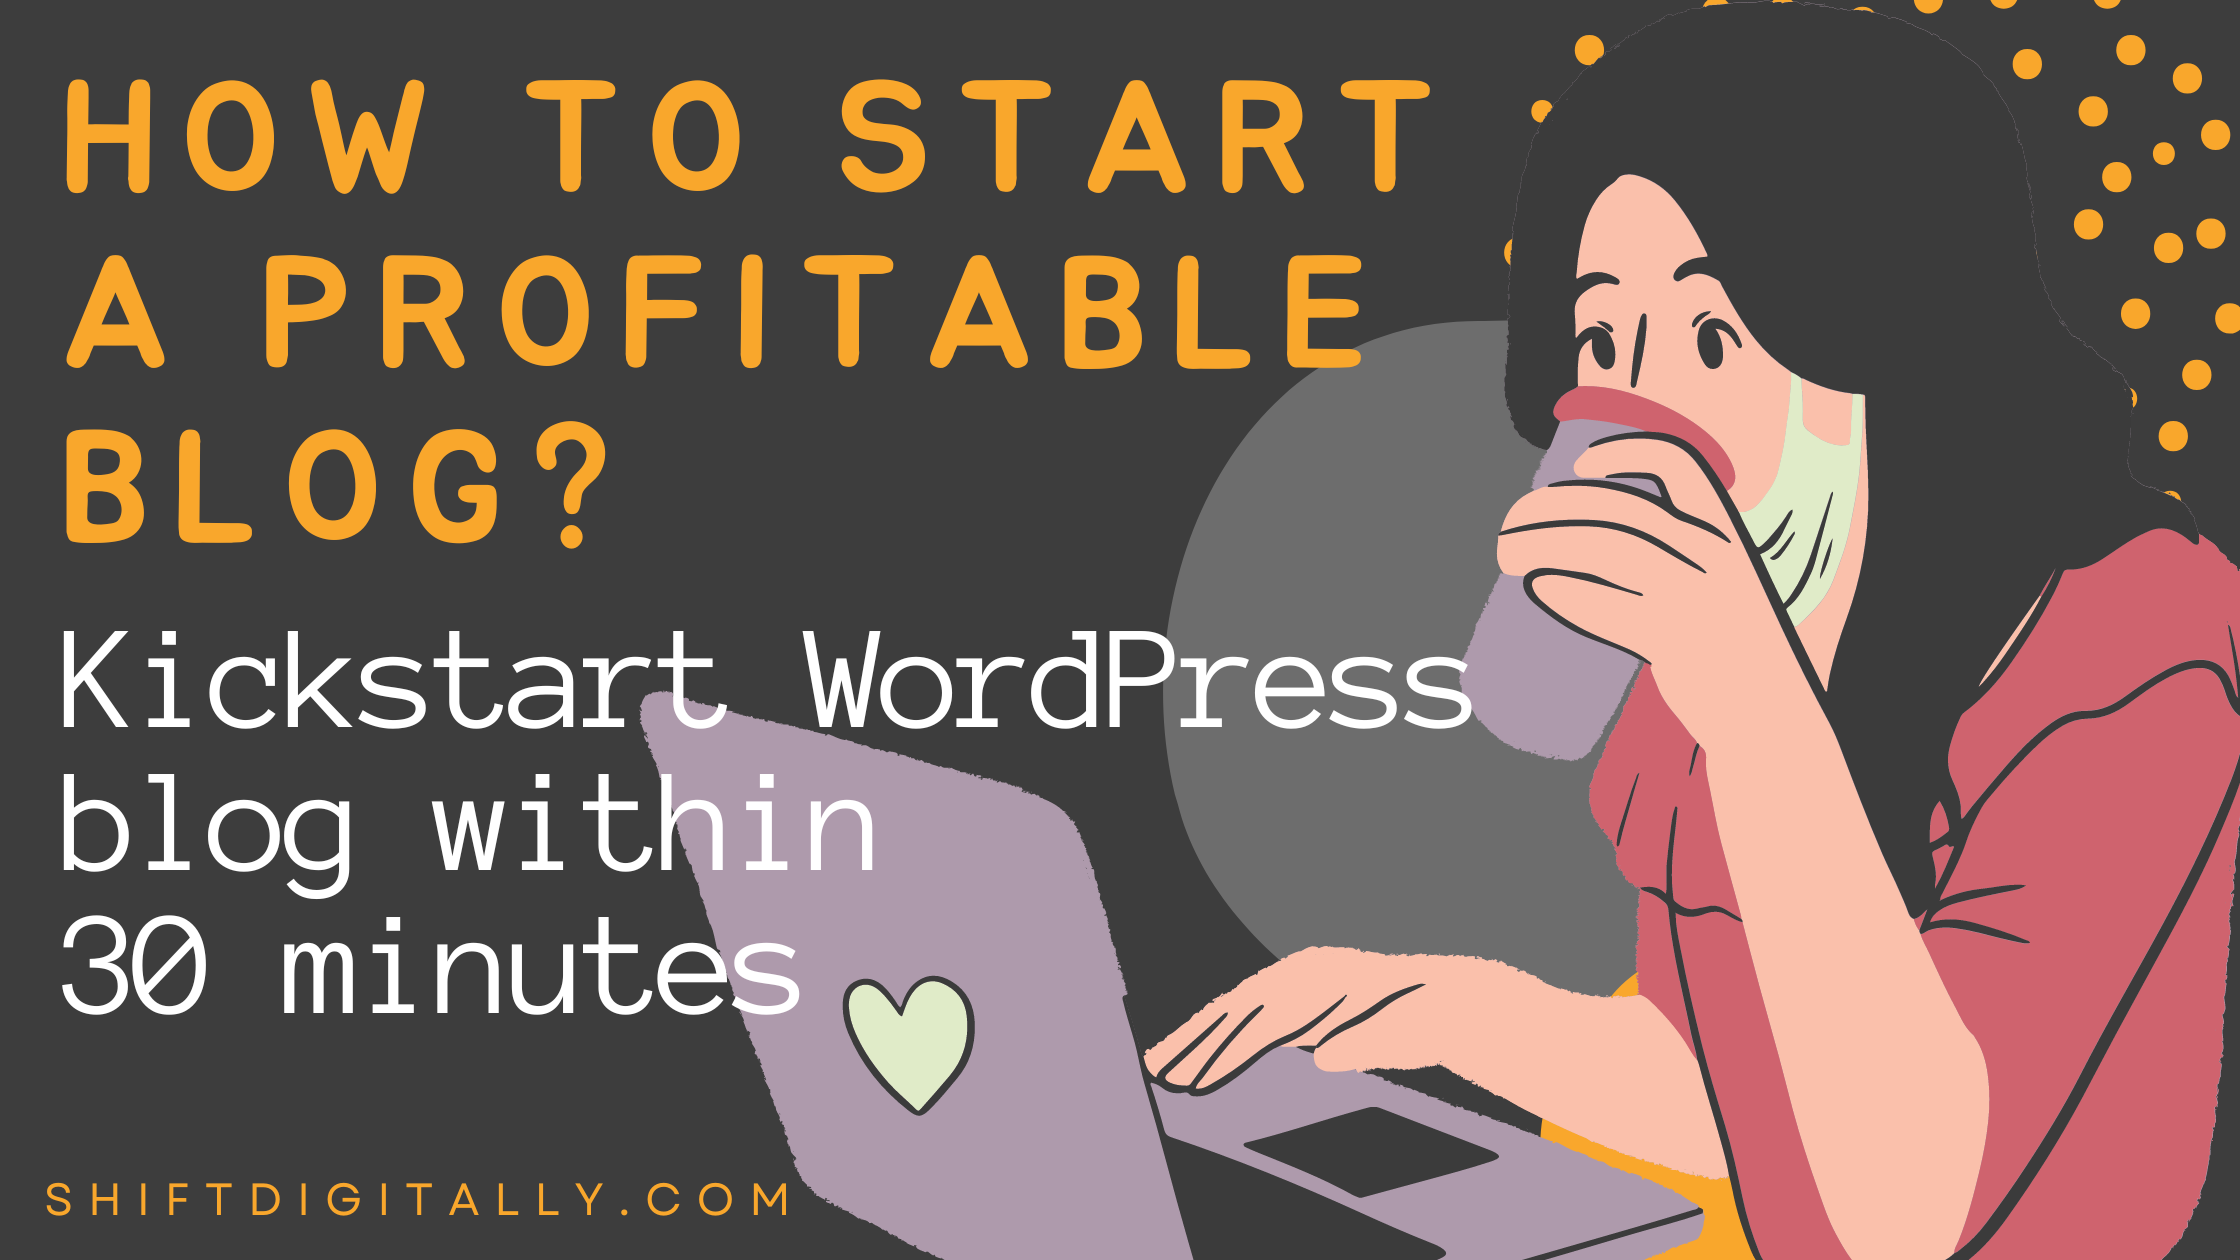
The year 2024 has just begun and if you’re thing about to start a blog then this blog post is really going to help you in creating a profitable blog from scratch.
It doesn’t matter if you’re a noob to blogging. I will tell you the exact way to kickstart a blog now. Why not let’s build one blog today?
It doesn’t matter if you’re into travel, lifestyle, tech, personal finance, or whatever you’re passionate about. I can guarantee that, by the end of the day, you’ll have a full-fledged blog up and running.
To save you time, I’ve created this free step-by-step blog tutorial to teach beginners like you how to make a blog quickly and easily. It’s not too complicated as many people think!
How to Start a Blog in 10 Easy Steps
Here is the following table of contents that you must follow. This beginner guide covers almost all the useful information, but don’t get overwhelmed, go through each step and you will succeed in blogging.
- Step #1: Pick a niche (topic) for your blog
- Step #2: Choose a blogging platform
- Step #3: Choose a domain name
- Step #4: Get Web hosting for your blog
- Step #5: Start a blog by setting up WordPress
- Step #6: Select a theme and design your blog
- Step #7: Write and publish blog content
- Step #8: Optimize your blog for search engines
- Step #9: Promote, market, and grow your blog
- Step #10: Make money blogging (optional)
But first, allow me to address the most basic questions which are most frequently asked about this field.
Why Should you Start a Blog in 2024?
Do you want to communicate something, like a message or an idea? Do you want to build a community around a topic you enjoy?
A blog can help you to accomplish many things, such as: inform, educate, promote and even sell.
Starting a blog can be a rewarding and enjoyable way to share your thoughts, ideas, and experiences with a wider audience. Here are the few generic reasons for kickstart a blog in 2024:
- Blogging can be a creative outlet: Writing a blog can be a fun and fulfilling way to express yourself and share your interests with others.
- Blogging can help you build an online presence: By creating and sharing valuable content on your blog, you can establish yourself as an authority in your field and build a following of loyal readers.
- Blogging can be a source of income: It opens various income generating resources for you. If you are able to monetize your blog through advertising, sponsorships, or selling affiliate products or services, it can become a source of income.
- Blogging can help you learn and grow: The process of researching and writing about a topic can be a great way to learn more about it, and sharing your thoughts and ideas with others can help you gain new perspectives and insights.
Overall, starting a blog in 2024 can be a great way to connect with others, share your passions and interests, and potentially even earn some extra income.
That’s why I started my blog too and you should start your blog today.
Now without wasting time, let’s start your blogging journey.
How to Start a Blog: The Best Way to do it
For a newbie blogger, here are 5 important steps to making a blog quickly. If you are familiar with these things, you can set up a blog in 30 minutes or even less:
- Pick a blogging niche (topic)
- Select the best blog platform
- Get a domain and web hosting
- Install WordPress software
Creating a blog is your first step in entering the blogging world.
Step #1: Pick a niche (topic) for your blog
In blogging, selection of a perfect niche plays an important role in your blogging journey and it can make or break the profitability of your blogging business.
In simple terms, a blog niche is a specific topic area that you will be writing about most often, or even exclusively.
A niche could be anything in which you think that you’re passionate about in that subject/industry/category.
Once you find your niche then you can start your blogging journey by creating a blog.
How to find your Niche?
Make a list of all of the topics/subject/industry/category for which you’re passionate that excite you and make you want to talk about them.
There are no restrictions – you can include any personal or professional interests in this list.
It doesn’t matter if you’re a professional writer/ marketer or a newbie. Please keep in mind that if you choose the wrong niche for your blog then it would be hard for you to monetize it for income later.
It’s definitely a time-consuming process and takes a lot of time, maybe a week to refine the best niche that suits you. So, don’t be in rush in selecting a perfect niche. This simple exercise will help you to select the niche that you are the most interested in. That way you will follow your passion and enjoy your blogging journey.
Congratulations! if you found your perfect niche on which you’re going to build your blog. Now move ahead for selecting blogging platform for your blog.
Step #2: Choose a blogging platform
At this step, you’ll need to look at the currently available blogging platforms which are widely used across the web and determine the type of blog content management software that you are going to use.
When it comes to blogging sites, you have a few options. Below are usage statistics showing the distribution of blog technologies in the India.
Top In Blog Usage Distribution in India
| Technology | Websites | % |
| WordPress | 530,672 | 55.31 |
| Blogger | 24,603 | 2.45 |
| Tumblr | 587 | 0.06 |
| Ghost | 564 | 0.06 |
| Hasnode | 348 | 0.04 |
| Medium | 335 | 0.03 |
As you can see from the graph above, WordPress CMS is by far the most popular and widely used technology for blogging, with over 90% market share in India.
I personally recommend you to build your blog using the self-hosted WordPress blog setup that I share in this guide.
You will set up your WordPress blog using a custom domain name and web hosting (I’ll show you how in the next step).
That way, you will be in total control of your blog and its contents. It will cost just a ₹150 per month for the webspace (hosting account), and around ₹800 per year for a domain. The actual blogging software is free and open source.
What about free blogging sites?
For many newbie bloggers, it’s tempting to start a blog using free hosted platforms such as Blogger or WIX and so on.
However, it’s important to understand that “free” always comes with some limitations:
- First, your blog name will be set as a subdomain (examples: “yourblog.blogspot.com” or “yourblogname.tumblr.com“).
- Second, you’ll be subject to their rules and restrictions.
Free options come in handy for testing a blogging platform. But, if you’re serious about starting a blog, you’ll have to start paying for full services and a custom domain name sooner or later.
Step #3: Choose a domain name
To make your blog using WordPress.org, you need 2 important things: a domain name and a web hosting company that’s it.
Let’s talk about domain names first.
Domain name is the address of your website that internet users type in the browser URL bar to visit your website.
In simple terms, if your website was a house, then your domain name will be its address.
Your domain name will be the name or URL by which you will be known online, no matter what niche you choose. It’s your blog’s unique address on the world wide web.
You already heard about some of the following popular blog name’s:
shoutmeloud.com (BLOGGING/TECH)
theblondeabroad.com (TRAVEL)
neilpatel.com (DIGITAL MARKETING)
cashoverflow.in (PERSONAL FINANCE)
gadgetstouse.com (GADGETS/TECH)
And so on.
But all these blog names sound short and catchy, easy to pronounce and type.
Similarly, your domain name must be come under the same way, no matter what niche you choose. It’s your blog’s unique address on the Internet. Just like this domain name for this blog is shiftdigitally.com, which works great for me.
Nowadays, finding a desired domain name is hard, because so many of the best domain names are already taken, especially if you’re looking for .com domain extensions.
So, try your luck if you succeed in getting your blog name on .com domain extension.
There are other domain extensions are also available in the market such as .net, .biz, .edu and many more. It doesn’t mean that these domain extensions are not good. You can search accordingly to your desired domain name.
Tips for Choosing a Domain Name for Your Blog:
- Should you use your personal name or pick a more general topic?
- Make it easy to type.
- Make it pronounceable.
- Keep it short and rememberable.
- Never use other companies brand names or trademarked slogans.
- Try to use broad keywords.
- Make sure that the blog’s name makes sense.
- Avoid numbers and hyphens in your domain name.
Don’t overthink it. It’s time to take action now, and gain momentum. Nowadays new webpages don’t rank on Google immediately, so the sooner you get started, the better.
Once you have your desired domain name ready to go, register it ASAP if you want to buy from any market.
But I will recommend you to buy a web hosting for your blog from Hostinger for the first time because it’ll give you a domain name for free of cost. (I’ll show you how in the 5th step).
Now it’s time to find and get the best web hosting.
Step #4: Get Web hosting for your blog
A web hosting provider is a company that stores your blog and makes it available to the internet. You can purchase both domain name and web hosting for your blog from any of these from companies like GoDaddy, HostGator, Hostinger or Bluehost etc.
To a great extent, the functionality and performance of your blog will depend on your hosting provider. The host makes sure that your blog is available 24/7 to potential readers and it’s where your content is stored online.
You need to find the one best web hosting that is reliable, safe, secure and has a good reputation.
I highly recommend Hostinger. You can get top-notch web hosting and secure a domain name for free. Additionally, they offer this quality hosting for less than ₹150 per month for new customers.
Hostinger, offers different types of hosting for blogs and business websites. Two of the most popular hosting plans for blogs include:
Shared Hosting: The most affordable type of hosting. With this type of blog hosting, users share the resources of one server between multiple websites. It’s excellent for small websites like personal blogs. Shared hosting plans start at ₹139/month.
WordPress Hosting: This type of shared hosting is specially optimized for WordPress websites. If you plan to use WordPress for your small blog, this plan is a perfect choice, starting at ₹139/month.
All of Hostinger’s hosting plans come equipped with a free SSL certificate, 24/7 live support, and are eligible for a 30-day money-back guarantee.
I recommend selecting for that middle plan, Premium Shared Hosting, because that’s the least you have to pay to also get a free domain. So, you don’t need to buy a domain name separately.
In Hostinger’s Premium Shared Hosting plan, everything has been optimized for WordPress, so there is very little you have to do to get set up. And you won’t have to spend a lot of time on an easy-to-use platform.
Let’s walk through the WordPress setup process using Hostinger web hosting.
Step #5: Setting up WordPress on web hosting
Head on over to Hostinger’s website by clicking here, then click Claim Deal Button and select WordPress Starter option.

When you select your hosting plan, you’ll be taken to the checkout page. Enter your personal and payment information here.
One thing to keep in mind is you’ll only get that ₹139/month rate if you commit to four years of hosting up front. Also, you’ll get a free domain for the 1st year.
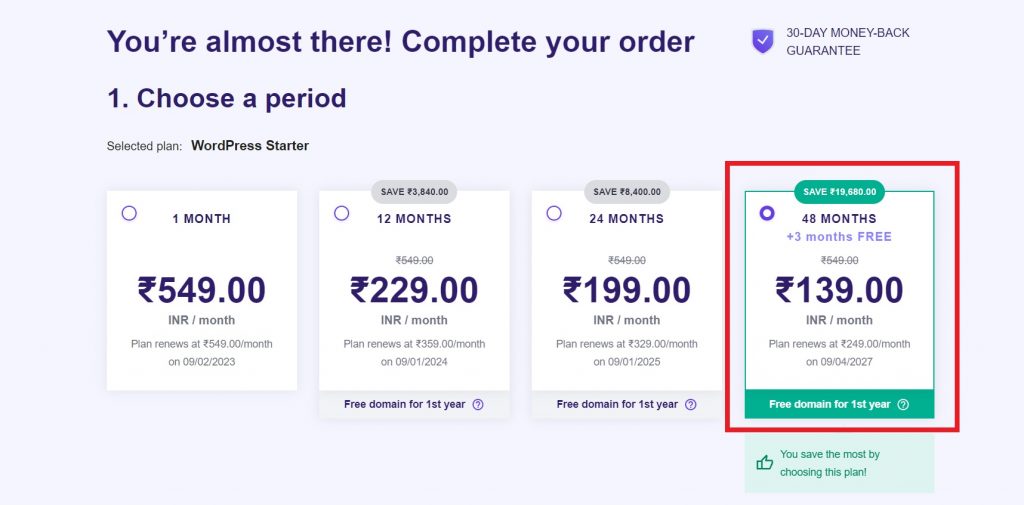
You can opt for a shorter one-year or two-year term, but you’ll probably have to pay around ₹150 more per month if you go one of those routes (depending on what promotional pricing Hostinger is running when you sign up).
Finish checking out and submit your payment information, then you’ll be taken to Hostinger’s great setup wizard.
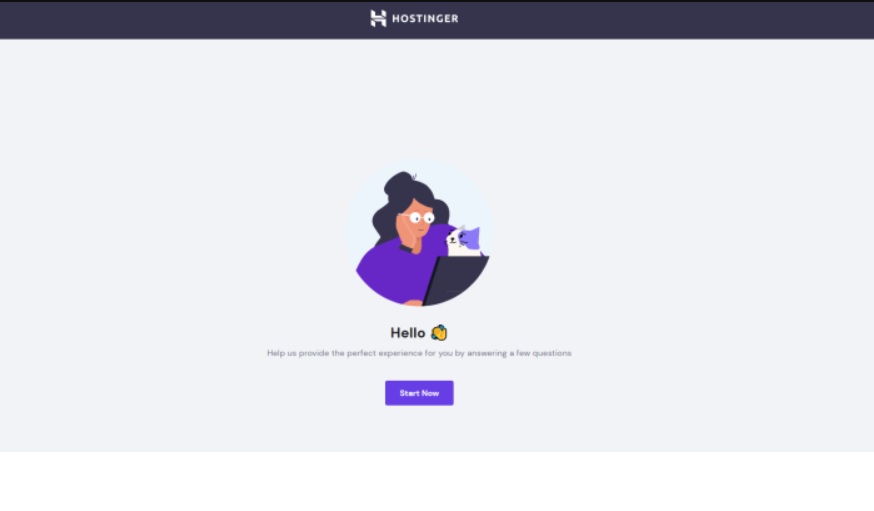
This is my favorite part. Hostinger’s wizard asks you just 3 quick questions to tailor the setup experience to your needs and comfort level.

If you’re a novice site builder, it gives you helpful assistance so you’re not left figuring out too much on your own.
It’ll show’s you four different options:
- Myself
- A Client
- A Company I work for
- Someone Else
Select Myself option because you’re building your own blog.
However, if you’re experienced, it takes care of all of the essentials and then stays out of your way to let you create the vision in your head.
Now select what kind of purpose of your web hosting which is obviously we’re going to create a blog. So, select A Blog Option.
Then, it will ask you what kind of experience level do you have as a website developer.
Here, it will give you 4 options:
- A Professional Website Creator
- Experienced in creating multiple websites.
- A Beginner, but I have some experience
- Creating my first website.
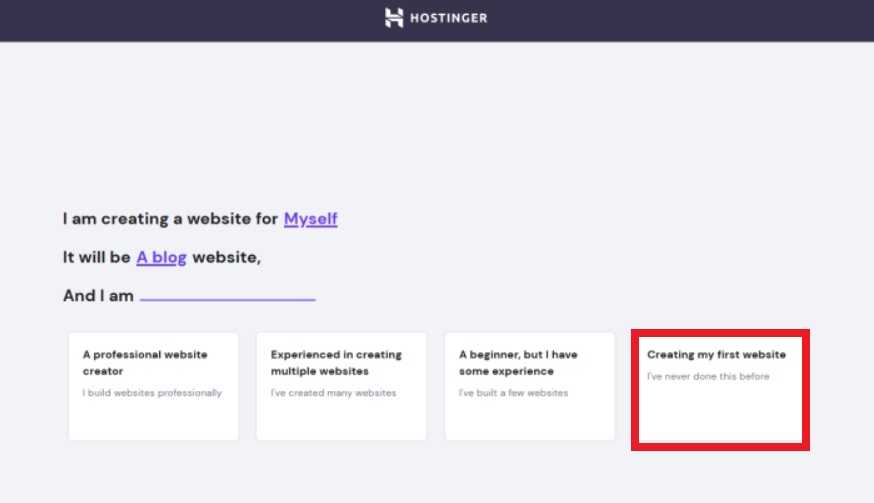
We’ll select the fourth option, as creating my first website because we’re a beginner.
For the sake of this guide, I’ve chosen to go through the rest of the setup as a beginner blogger who is creating a blog for myself.

Next, you’ll choose the platform you want your site to run on. Since we’re talking about making a WordPress blog, go on ahead and select WordPress on the left.
When you click on WordPress, Hostinger will display a field for you to create a new WordPress account or sign into your existing one. You don’t even have to leave the wizard to complete that step.
Hostinger even helpfully offers a selection of site templates to start with.
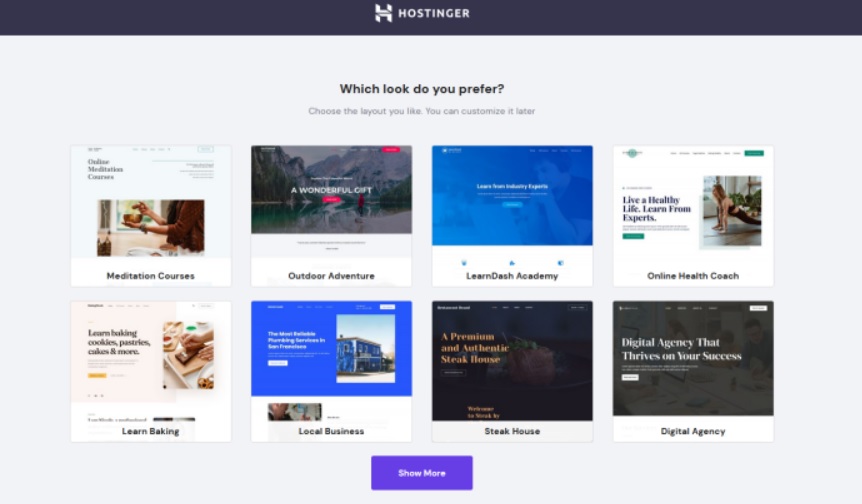
Check out the suggested themes from Hostinger and see if you like any of them (if you don’t see a theme you like, skip this step). You can always change your theme and use a different one later. More information on this further on.
Next comes a crucial step. You’ll secure your WordPress blog’s domain. And here comes the step where you will get a free domain name with your Hostinger Premium Shared Hosting plan.
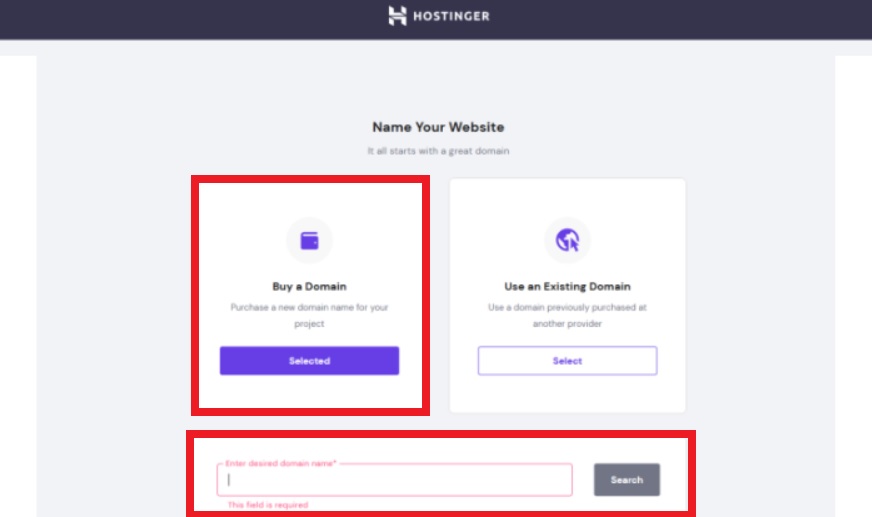
Click Buy a Domain button on the left side. A field will appear below where you can search for available domains.
Since you already did the hard work in finding your desired domain name which is available, just enter that here and select it in the field after you click on Search button at the below.
You can leave it if you don’t want to secure your domain by adding WHOIS privacy. But I strongly recommend spending the extra ₹800 per year for WHOIS privacy. It keeps your personal information secure from becoming public.
Normally, hackers or scammers can see who owns any domain, but with WHOIS protection enabled, they will only see Hostinger’s business information that it.
Next, you’ll need to complete checkout on that screen since you’re adding the paid WHOIS privacy add-on to your plan. But after that, believe it or not, you’re all set!
Hostinger will take a couple minutes to install WordPress for you and connect your domain to your new site. Once that’s finished, you’re taken to your account dashboard.
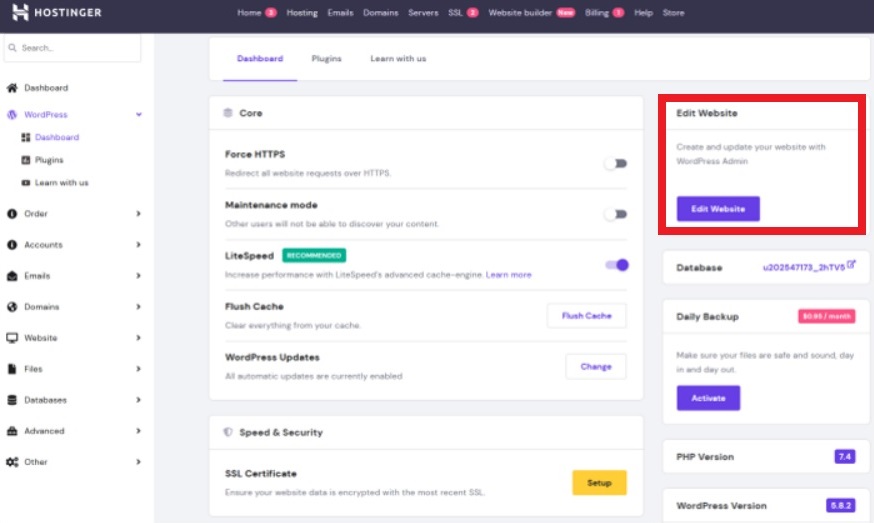
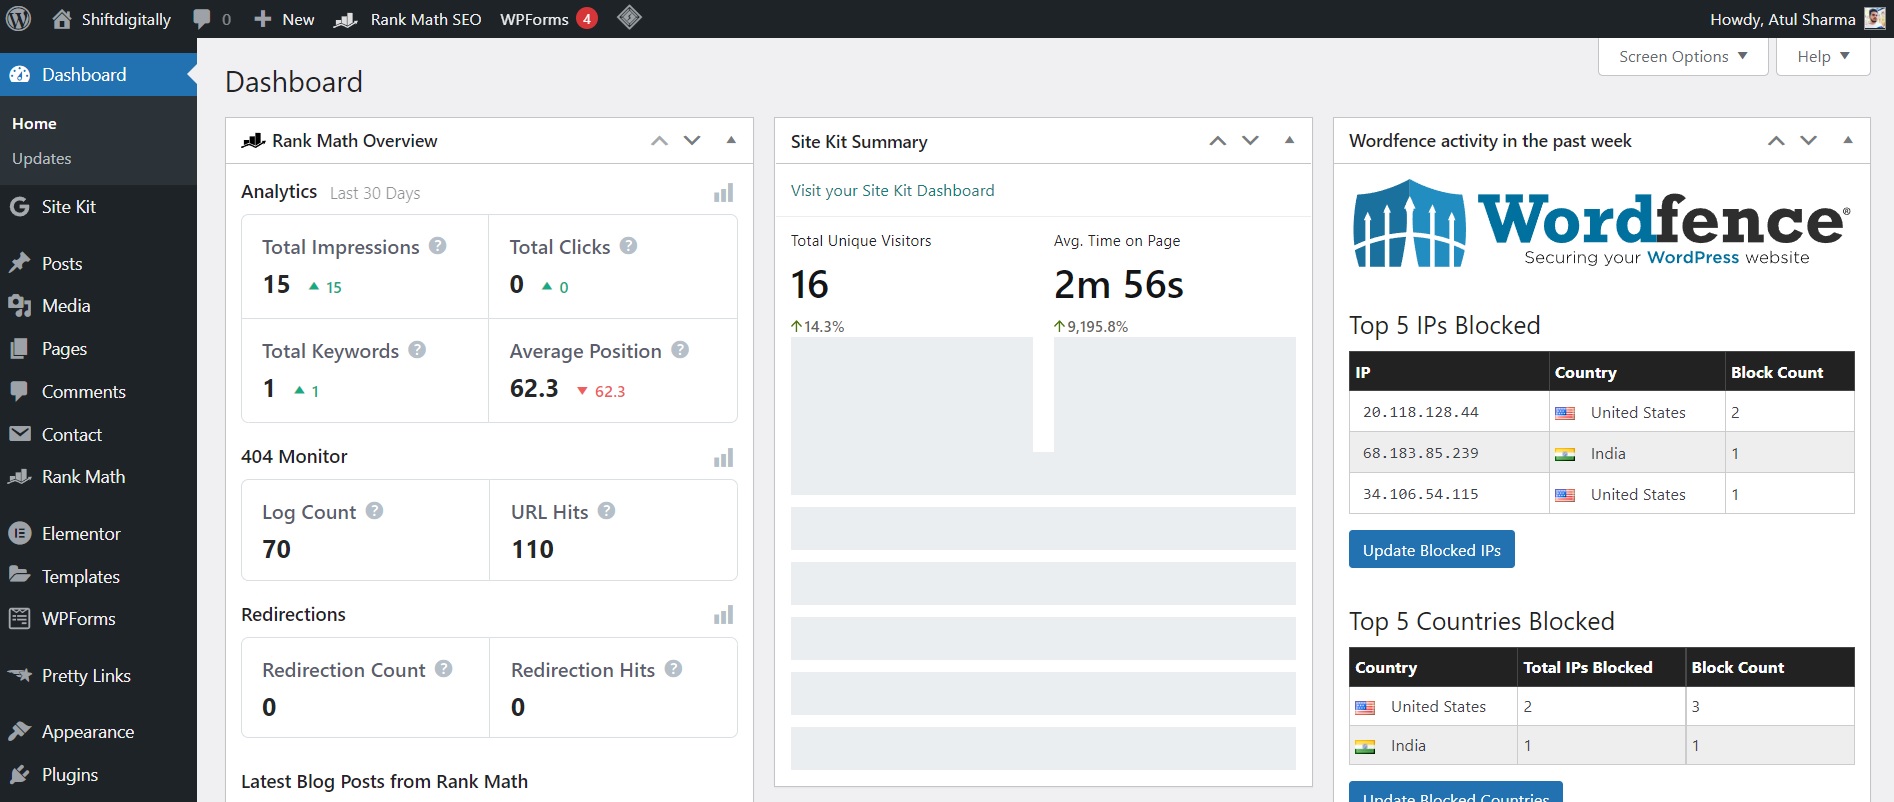
You can work on your WordPress site by clicking WordPress in the left-hand navigation menu in your Hostinger account dashboard.
That will show you the current version of WordPress installed, any issues that need attention (such as an SSL certificate needing to be set up, as you can see in the image above), and much more.
I strongly recommend you to setup SSL Certificate to your domain name. It ensures your domain name is secured by adding HTTPS prefix which gives your blog domain extra protection of layers.
Basically, it enables websites to move from HTTP to HTTPS, which is more secure. And it shows a padlock
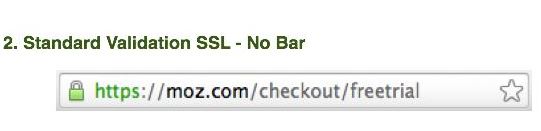
An SSL certificate is a digital certificate that authenticates a website’s identity and enables an encrypted connection.
Since WordPress is already installed, you can launch right into building out your blog.
Just click Edit Website on the right and you’ll be taken to the WordPress interface which looks like that.
Voila! Now, your site is live and ready for your audiences.
Step #6: Select a theme and design your blog
Now it’s time to change the theme settings on your WordPress website which we had skipped while setup web hosting on Hostinger’s account.
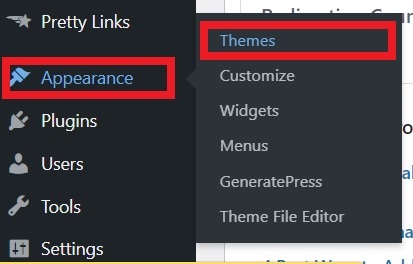
From your WordPress dashboard, hover over Appearance near the top of the left-hand menu bar, then click on Themes.
The first thing your blog needs is a good look interface (design and layout).
It’ll give your blog a professional look. Installing a WordPress theme is a piece of cake for you. It’s just a few second task.
There are plenty of WordPress themes which are available for free as well as paid if you want some additional features then go for it.
You can pick the theme as per your blog’s category and install it quickly and easily. You can check the guide to install a WordPress theme here.
I personally recommend for beginners to install GeneratePress free version WordPress theme which is fast lightweight theme that loads quickly on web browser.
For additional features you can buy GeneratePress Premium theme if you can afford it.
But as a beginner, don’t buy any paid theme for your blog. Start with a free theme. Once your blog is growing then you can upgrade it by any Paid theme and customize it later as you want.
Remember, you can always pick a different theme later as you continue setting your blog. All of the pages and unique content that you create will be transferred automatically to a new theme layout.
Blog theme customization
So, finally you have added a theme in your WordPress blog. Now it’s time to do some basic customizations in your blog’s theme design.
WordPress has unlimited customization options so it’s impossible for me to cover everything in this guide. Instead, I’ll cover the first most important changes you should apply to your blog.
For this example, I’ll be using the GeneratePress theme.
Now, let me show you where you can do basic customizations of your blog. That includes: uploading the logo you just created (or will create in the future), editing the blog title and tagline, changing colors, uploading the background image, and making homepage settings changes.
As I’ve mentioned, I’ll be showing you how to apply these changes to the GeneratePress theme. If you picked a different theme the process could be slightly different. However, in most cases, all themes have similar customization options.
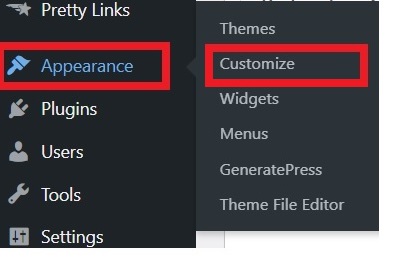
To start customizing your blog, go to the WordPress admin dashboard. Locate the Appearance tab on the left-hand side and choose the Customize option.
The customization of each of the WordPress themes will be different. In my case, I’ll show you the customize options for the GeneratePress theme which I’m using.
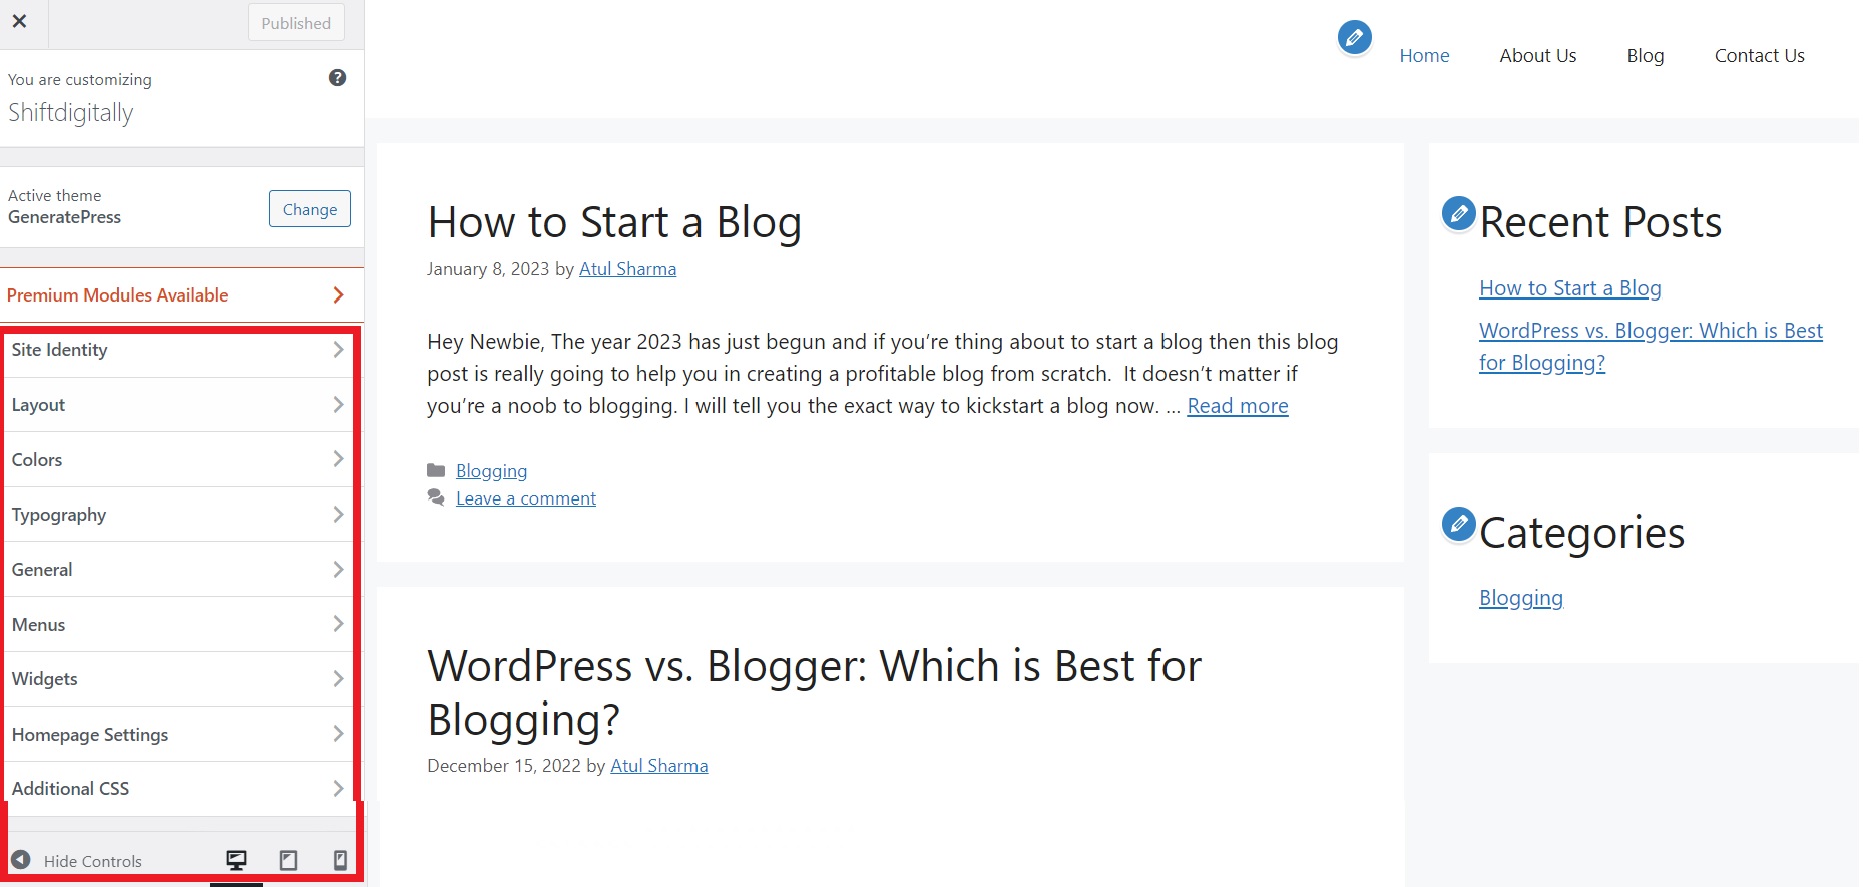
On the left-hand side, you will see the following Customizing menu options:
- Site Identity – Upload your logo, change site title and tagline, and upload site icon.
- Layout – Customize your blog’s layout options such as container, header, primary navigation, footer, sidebars etc.
- Typography – Customize your fonts using Google Fonts, local Fonts also you can set dynamic fonts for your blog.
- General – Choose to replace the standard font icons used throughout the theme with SVG icons. Add underlines to your links in your main content areas.
- Colors – Change your blog’s background color, header, and footer colors, and customize the primary color.
- Theme options – Select if you want to show a search icon in the header of your blog and show an author bio for your posts.
- Menus – Customize your blog’s menu, social media menu links, and change locations where they are displayed.
- Widgets – Customize your footer, add a description, and how to find you if you have a physical location.
- Homepage settings – Choose what’s displayed on the homepage of a blog. It can be the latest blog posts or a static page.
- Additional CSS – Add your own CSS code to customize the appearance and layout of your site (advanced option).
You can also cross-check how your blog looks on different devices by using the menu at the bottom with three icons: desktop, tablet, and mobile devices.
Add plugins to your blog
In WordPress, Plugins are bundled pieces of code that affect the way your site looks and functions. They can add new functionality to your WordPress blog, extend your theme’s capabilities, and personalize a blog as a whole or in part.
By default, when you set up your blog, Hostinger will automatically add some plugins they think are important for any website. You can review these plugins inside the WordPress dashboard and add new ones by clicking the Plugins tab on the left-hand side.
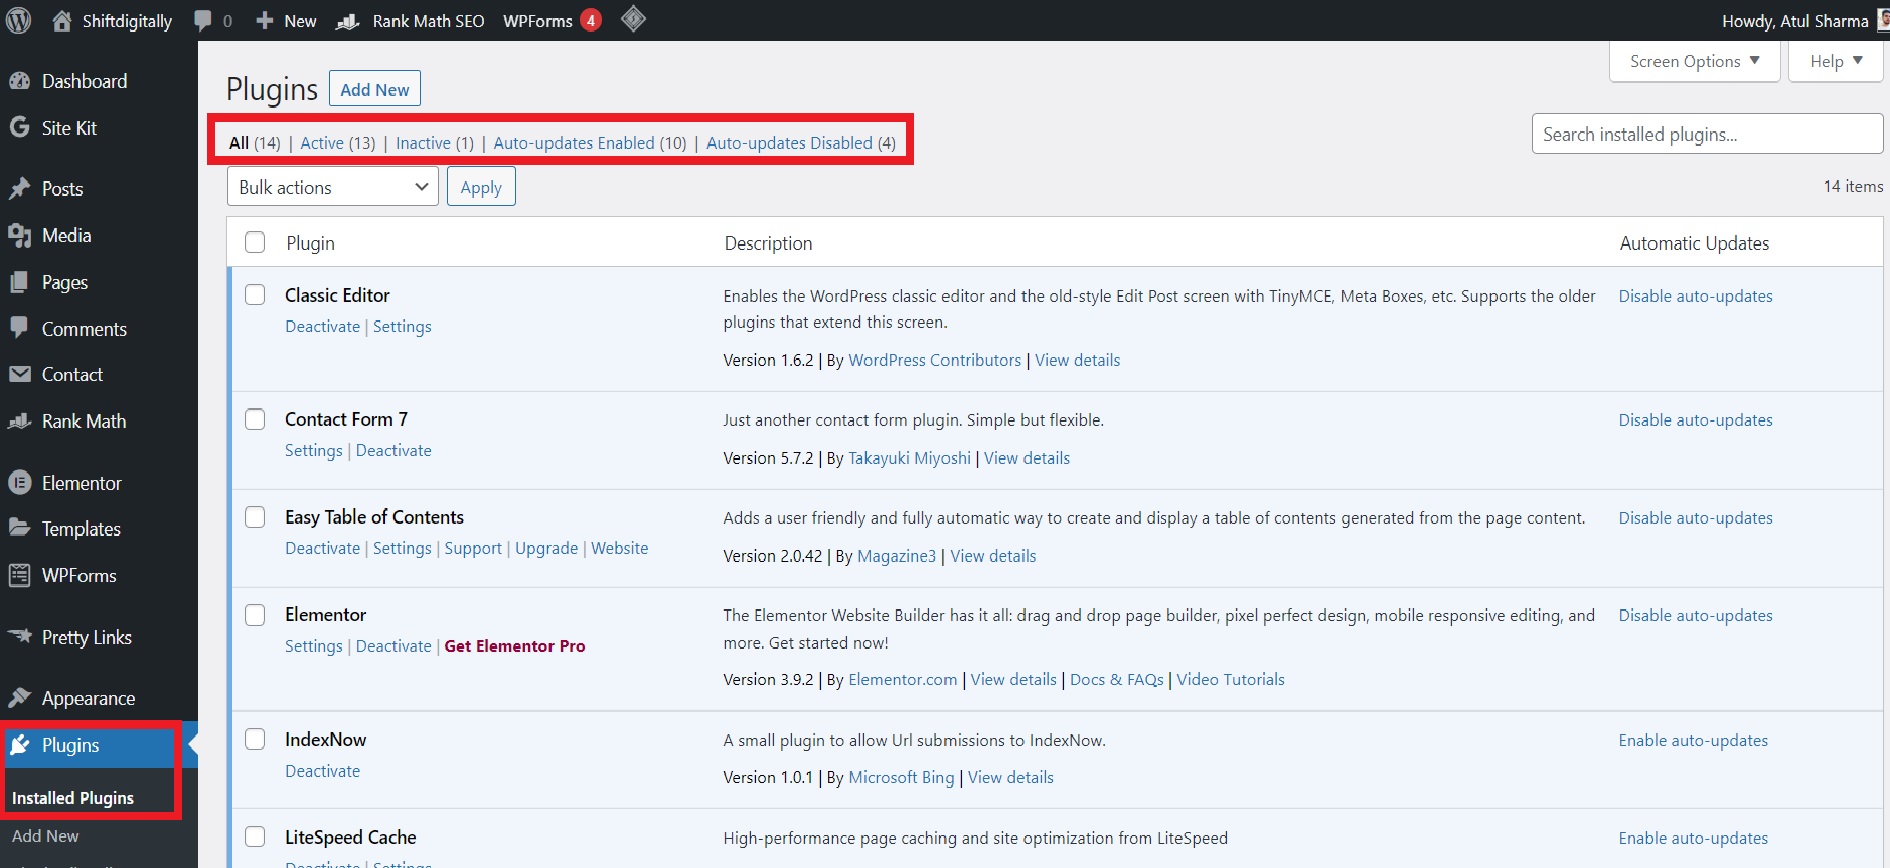
Here you can install new plugins, deactivate, delete, and update them.
Below, I’ll show you some suggested plugins that you should be using.
To save you time, I’ve selected some important plugins (free) for your immediate blogging platform needs:
Recommending Plugins
- Google Sitekit – All in one plugin by Google. It connects Google search console and Google Analytics plugin for WordPress, to monitor and analyze your website traffic, webpage performances and site speed in one in a go.
- Rankmath SEO – A comprehensive SEO plugin for your blog, to optimize your content for search engines.
- WP Super Cache – Helps with the load time of your WordPress blog and delivers content to your readers faster.
- Akismet – Protects your comments and contact form from spam and prevents your site from publishing malicious content.
- Contact Form 7 – A contact form with flexible email options. It supports CAPTCHA and Akismet spam filtering.
- WordFence – Web Application Firewall identifies and blocks malicious traffic.
- YARPP – Creates a related blog posts list at the end of each piece of content automatically to encourage people to continue browsing your site.
Congratulations, you just learned how to customize your blog and make web design update changes! Your blog framework is totally complete.
The next step is to learn how to write content for your blog.
Step #7: Write and publish blog content
Now, you need to learn how to write content for your blog. WordPress CMS is designed in a way that you can publish your content as Posts or as Pages.
Before you begin publishing posts (day-to-day writing blog posts on your favorite topics) on your blog make sure you fill in all the important static pages with content (such as About us, Contact, Privacy Policy etc.).
Let’s explore those types of pages.
Prepare and publish content on main webpages
Depending on your individual needs you can decide what pages you want to publish. These are the most common pages widely used by bloggers:
- Homepage – This depends on what type of layout you choose. As I described above, when customizing your blog, you can choose to display the homepage as a static page. In that case, you will have to prepare content for it. Although as a beginner blogger, you can setup for showing your upcoming blog posts which you’re going to post.
- About us – The most traditional page on any blog is the “About us” page. This page tells a short story to your audience about your blog, who you are and why you run a blog about your niche topic.
- Contact – This page allows your audiences to your blog to communicate with you. It can be a straightforward page with your email address and your social network links, or you can use a simple contact form that anyone can use to communicate with you.
- Products, Services, Resources – It’s a static landing page with any additional information that you want to include on your blog.
Here’s an example how you can create such pages on your WordPress blog quickly,
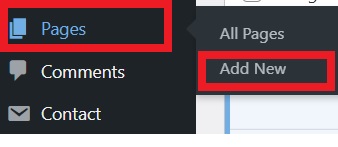
- To create a static information page, log in to your WordPress dashboard admin area using your login details (username and password).
- Go to “Pages” menu item on the navigation menu located on the left-hand side of the Dashboard. And click on “Add New”.
Let’s consider, you’re creating your About Us page for your blog.
Add New Page Title as “About Us” on the top of the dashboard.
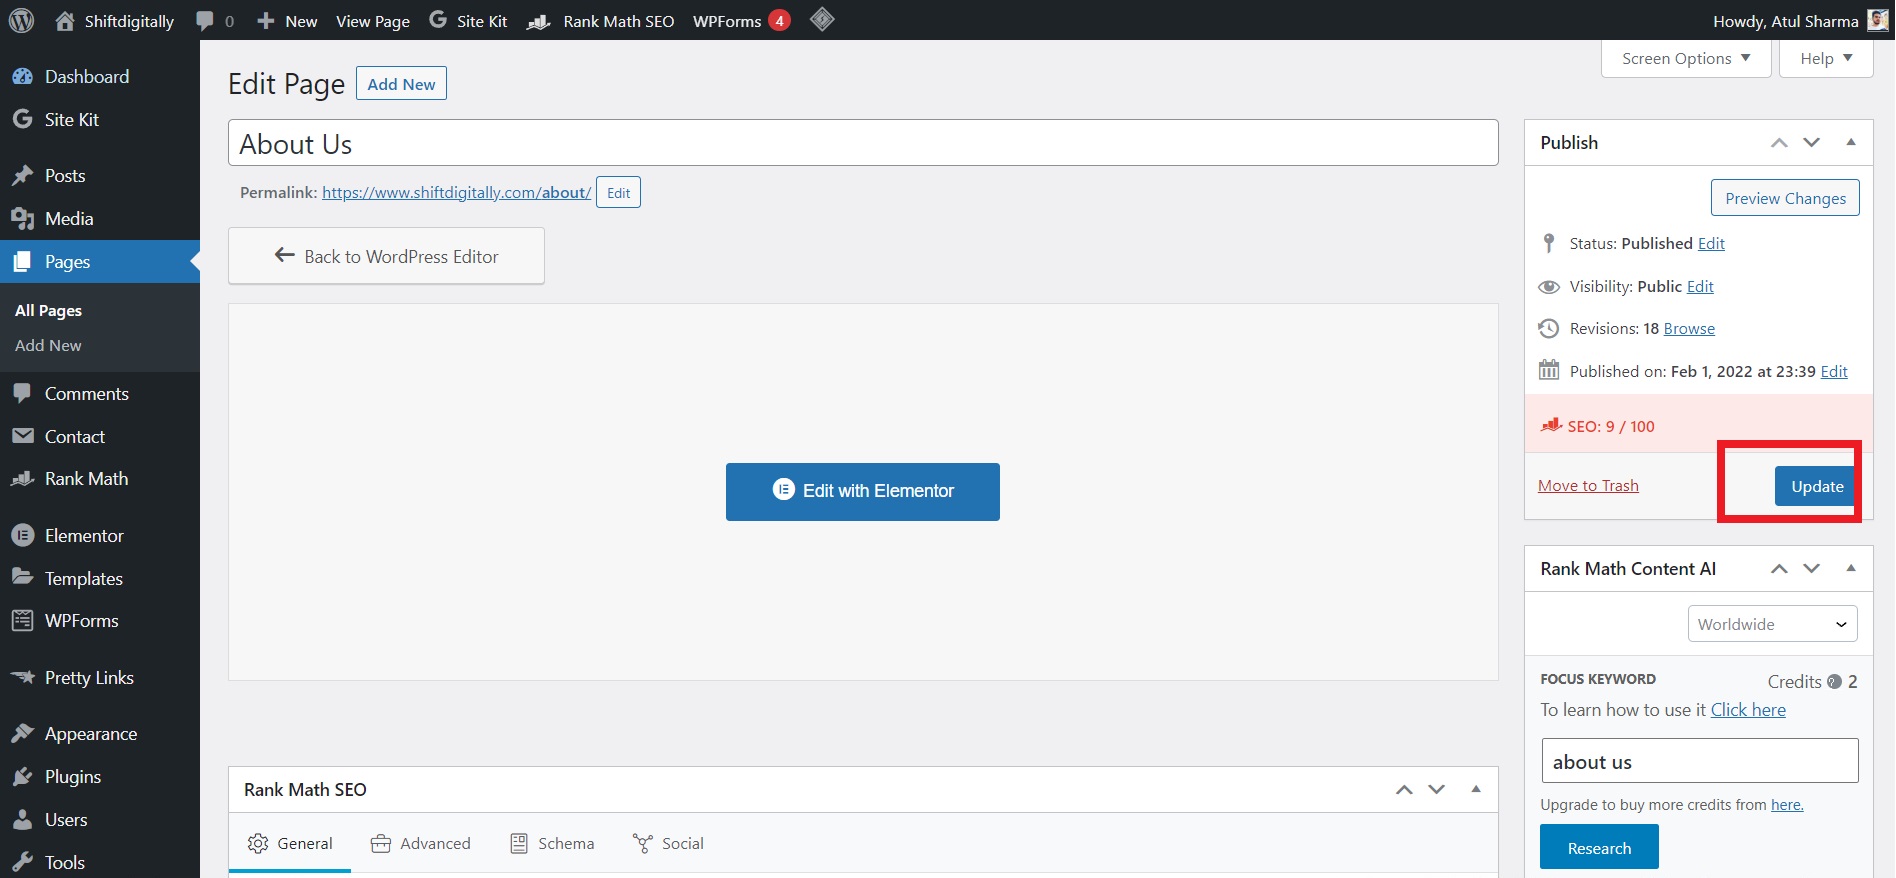
Now, paste the content which you want to show there and click on the Publish button on the top right-hand side of the dashboard.
And that’s how you can create all necessary static webpages for your blog within a minute.
Similarly, you have to create pages for Contact Us, Privacy Policy as well as Disclaimer page (For promoting affiliate products)
Make sure you have properly aligned your content with images which you’re going to publish publicly.
Write your first blog post
Creating blog posts inside WordPress is totally similar to creating pages. However, for a blog post WordPress allows you select categories and tags while pages don’t.
Now, you’re confused! How can you write quality blog posts? It’s quite simple.
First try to research which topics are trending on the web that comes under your niche. Do proper keyword research for that and make it simple for the readers to understand.
Here’s an example how you can a blog post on your WordPress blog quickly,
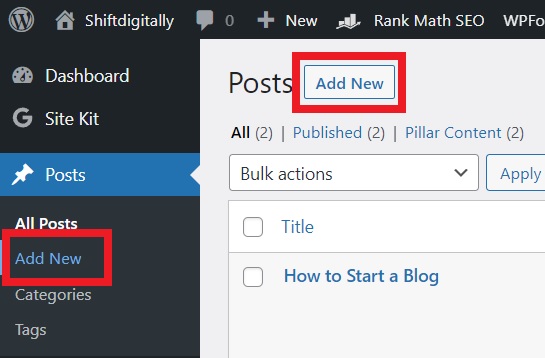
Go to “Posts” menu item on the navigation menu located on the left-hand side of the Dashboard. And click on “Add New”.
Let’s consider, you’re creating an introduction blog post about yourself then the title of the post could be “Welcome to my blog”.
Add your Post Title as “Welcome to my blog” on the top of the dashboard.
Now, paste the content which you want to publish and click on the Publish button on the top right-hand side of the dashboard.
So, that’s how you can publish a blog on WordPress CMS. Hope you got it clearly.
Step #8: Optimize your blog for search engines
Now you’re wondering about how you will optimize your blog ASAP so that your readers will read your blogs while searching on the web and you’ll get tons of organic traffic to your blog.
That’s where SEO comes in the game. Search engine optimization (SEO) is the long-term process that website owners use to get tons of organic traffic to their webpages from search engines (such as Google, Bing).
But it’s not as easy as you think. SEO is a time-consuming process and nowadays optimizing any website or blog is very difficult.
Search engines like Google and Bing are getting smarter day by day and due to heavy competition, it’s hard to optimize as per search engine standards.
Don’t worry about that, it’s not easy but it’s not impossible too.
Here are the following things you can do initially for SEO on your blog ASAP.
- Register your blog on Google search Console or Bing Webmaster Tool.
- Add Google SiteKit plugin and follow the sign in process.
- Add anyone of the following SEO plugin in your WordPress Blog such as:
Keep in mind that with a brand-new blog your traffic will be minimal to start with. However, this will increase over time as long as you continue to add informative and relevant content on a regular basis.
As a bare minimum, you will have to do the following two things for every blog post or webpage you publish on your blog.
- Perform proper keyword optimization:
Do proper keyword research on the topic which you’re going to publish as a blog post or a webpage.
- Add proper SEO meta tags on all pages:
You will need to add SEO meta tags for each piece of content whether it’s a blogpost or a webpage.
Basically, meta tags are used to tell the search engine what the webpage is about.
Have you observed meta tags in Google search results like this:

These are the title tag and meta description tags. Sometimes, these tags are not seen on the actual page, but Google will use metadata to better understand what the webpage is about. You can add SEO meta tags via free SEO plugins which I mentioned earlier.
Keep in mind:
The title tag length should be between 50-60 characters (this is what Google typically displays) and the meta description tag can be between 50-160 characters.
Remember, if you want to start ranking your blog content in search engines, this is an important step to complete.
Step #9: Promote, market, and grow your blog
Here are a few strategies you can use to promote, market, and grow your blog:
Optimize your blog for search engines: Use keywords in your blog titles and content, and use tags and categories to help search engines understand what your blog is about.
Use social media: Share your blog posts on social media platforms like Twitter, Facebook, and LinkedIn. Join relevant groups and communities, and engage with other users to promote your blog.
Build an email list: Collect email addresses from your readers and send them updates when you publish new content. You can use an email marketing service like Mailchimp or Constant Contact to manage your list and send emails.
Network with other bloggers: Comment on other blogs in your niche and reach out to other bloggers to collaborate or guest post on their blogs.
Use paid advertising: Consider using paid advertising on platforms like Google Ads or Facebook Ads to reach a larger audience.
Improve your writing and SEO skills: The more valuable and informative your content is, the more likely people are to share it and link to it, which can help improve your search engine rankings.
Repurpose content: You can repurpose your content, create graphics, slideshow presentations, audio files, or even videos and publish it all on the platforms that support different content formats. Here is how you can make 64 pieces of content in a single day (PDF).
Set up a Google Analytics account to track your blog’s performance and visitors. And improve and plan upcoming blogging content by analyzing blog performances.
Remember that you can always find other ways to promote your new blog.
Step #10: Make money by blogging
Monetization is the process that converting your blog activity into passive earnings.
If you want to make money from your blog, you’ll also want to do some research to see if there is a market demand for your niche.
Just ask some question yourself:
Are people actively searching for that topic what you’re writing about?
And can you add value and help them in a way that makes you money?
In order to create a business from your blog, you need to solve a real problem for people.
Here are the following types of content that you should consider writing and adding to your blog:
- Listicles or top list
- How-to guides
- Tutorials and manuals
- Product reviews
- Product comparisons
Now, let me show you some different ways bloggers make money.
Advertising: You can sell advertising space on your blog to companies who want to reach your audience. This can be done through advertising networks like Google AdSense or through direct deals with brands.
Sponsored content: You can work with brands to create sponsored content, in which you promote their products or services in exchange for payment.
Affiliate marketing: You can earn a commission by promoting other companies’ products on your blog and earning a referral fee when your readers make a purchase.
Selling products or services: If you have your own products or services to sell, you can use your blog to promote them and drive sales.
Donations: You can ask your readers to support your blog through donations or by becoming patrons on platforms like Patreon.
To make money through blogging, it’s important to have a consistent and engaged audience, as well as a clear monetization strategy. You may also want to consider working with a company that can help you monetize your blog effectively.
Conclusion
Congratulations! You’ve learned how to start a blog. Now, you have bought your own domain name, web hosting space and your blog is set up completely on initial stage to start blogging.
Next, you will need to get familiar with the WordPress dashboard, make desired changes, start content creation, and promotion to become a successful blogger. Check out all our resources for starting a blog and learn how to blog successfully.
I hope this guide has answered any questions you had on how to start your blog. Please let me know in the comments.